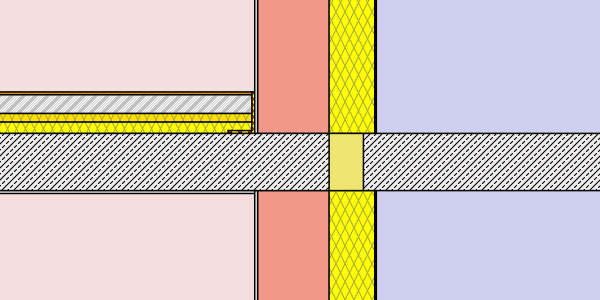
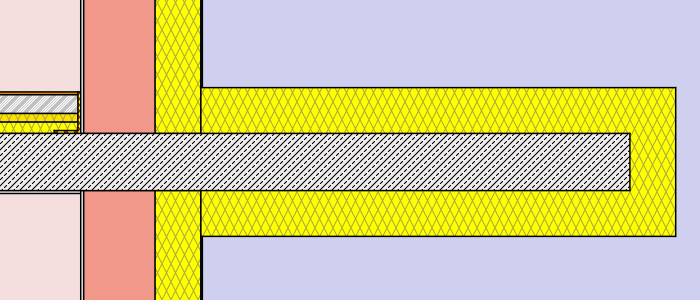
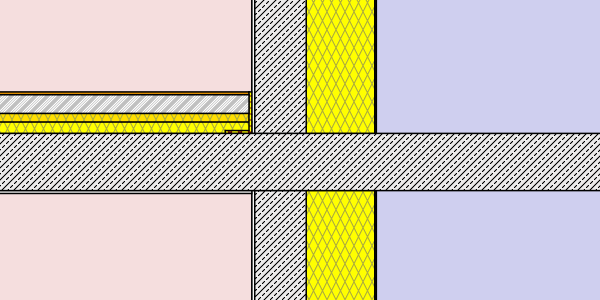
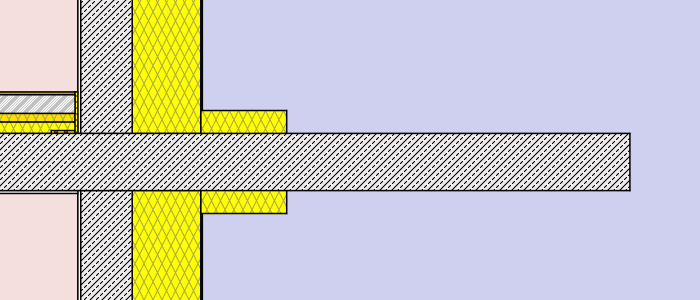
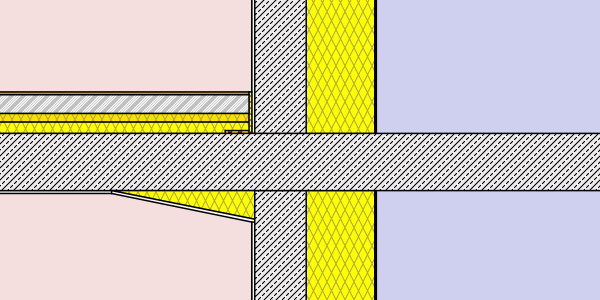
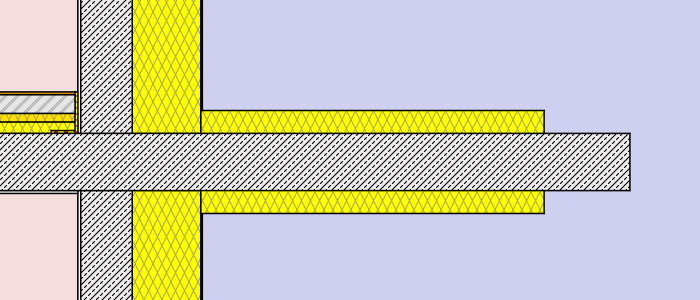
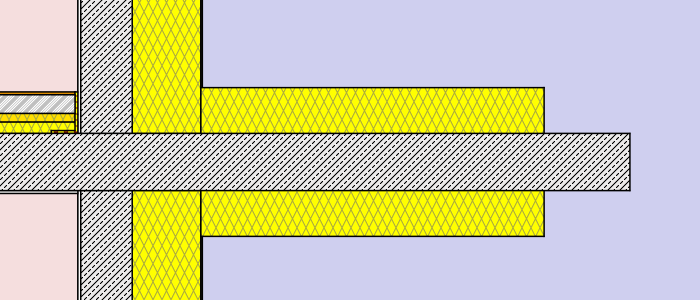
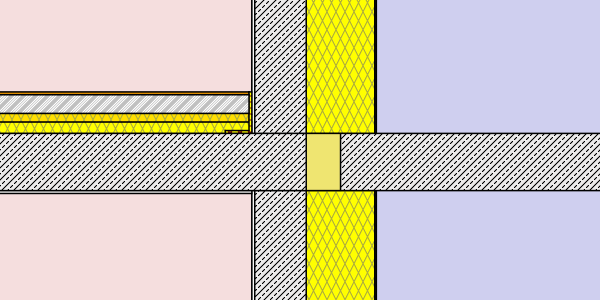
In the study various insulation methods of a cantilevered slab (e.g. a balcony) are being compared. The study covers only the energetic (heat loss) and thermal aspects of the different cases. Economic, aesthetic and constructive aspects will also have to be considered, but are not part of this review.
When assessing a thermal bridge two different effects have to be considered:
- Local reduction of the surface temperature caused by the thermal bridge
The temperature reduction is characterized through evaluating the lowest interior surface temperature. This temperature should stay above dew point temperature to avoid condensation on the wall or ceiling. However generally it is required that temperatures also range above the so called “mould temperature”. At this temperature the indoor air reaches a humidity level of 80%. When the 80% humidity level is reached or exceeded for an extended period the formation of mold is very likely. - Additional heat loss due to the thermal bridging
The so called “U-value” reflects the heat loss per square meter (sq.foot) of a wall at a temperature difference of one degree. By analogy the Ψ-value (“psi“) or linear thermal transmittance is used to characterize the energy loss of a linear thermal bridge. Accordingly it measures the heat loss per running meter of the construction at a temperature difference of one degree.
Boundary conditions
The simulation model assumes a cantilevered balcony and both floors to be heated. The interior temperature is 20°C, whereas the external temperature is -5°C. The dew-point and mold temperatures are calculated based on the assumption of an indoor relative humidity of 60%.
Apart from the minimum temperature the so called temperature factor f*Rsi has been calculated. The value describes the temperature drop independent of the actual temperature difference.
Models
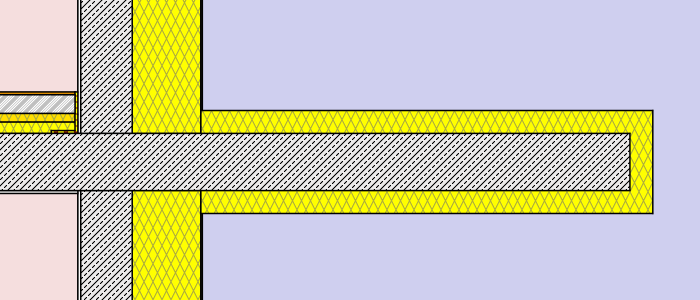
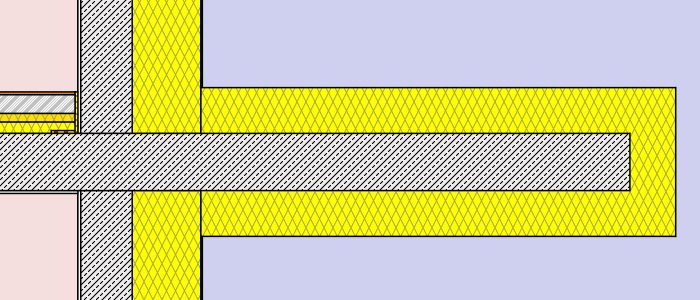
The model consists of a reinforced concrete slab that forms a cantilevering balcony with a length of 150cm (measured from the outer wall surface). The slab has a thickness of 20cm.
Two different types of wall constructions are examined, as the effect of the thermal bridging differs with the conductivity of the wall:
| reinforced concrete wall1cm plaster (λ=0,7 W/mK) 18cm reinf. concrete (1% steel) (λ=2,3 W/mK) 24cm insulation (λ=0,038 W/mK) 0,5cm synthetic resin render (λ=0,4 W/mK) U-value: 0,152 W/m²K |
masonry wall1cm plaster(λ=0,7 W/mK) 25cm hollow brick (λ=0,12 W/mK) 16cm insulation(λ=0,038 W/mK) 0,5cm synthetic resin render(λ=0,4 W/mK) U-value: 0,154 W/m²K |
Regarding the insulation 12 different cases were analyzed:
- no insulation (reference)
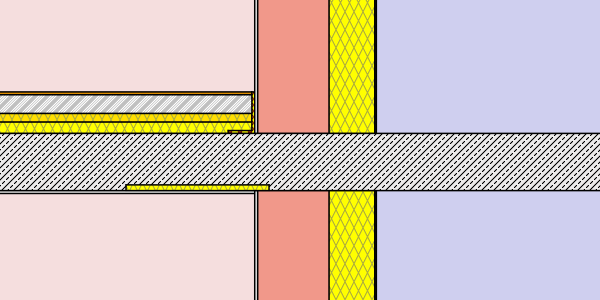
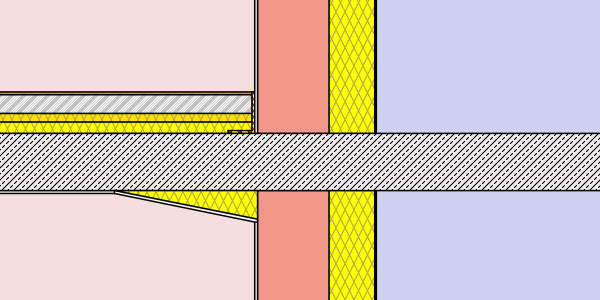
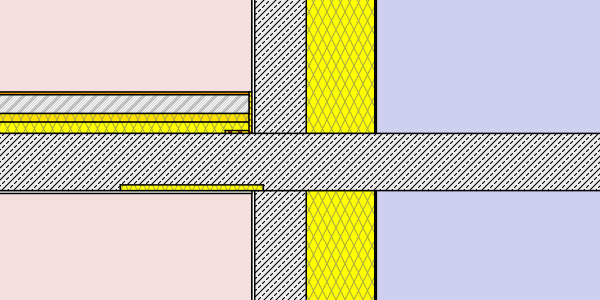
- internal insulation – insulation panel inlay 50 x 2 cm
- internal insulation – insulation wedge in the corner 50 x 10 cm (below plaster)
- thermal break – thermally separated balcony – (Isokorb model KXT 30 R90)
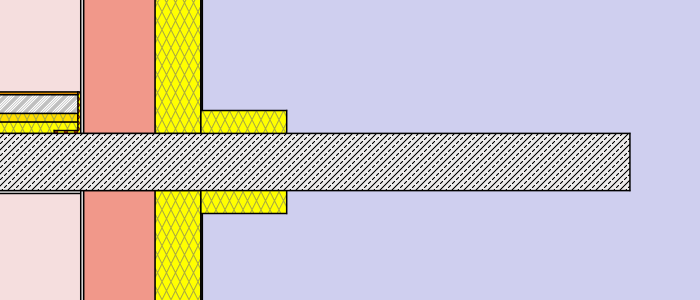
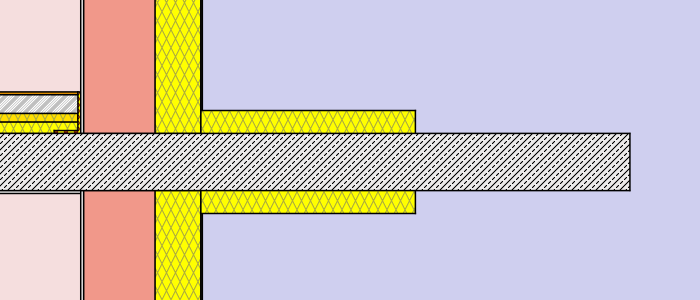
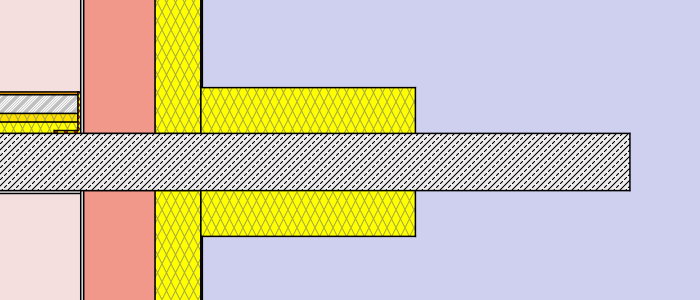
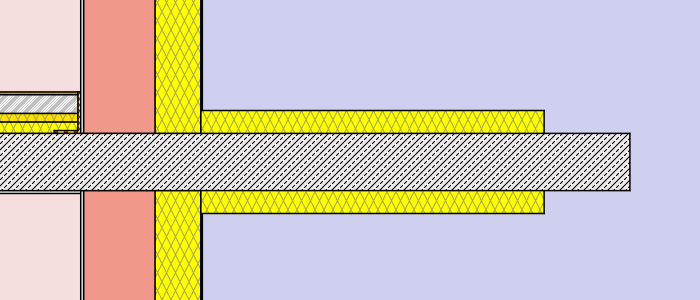
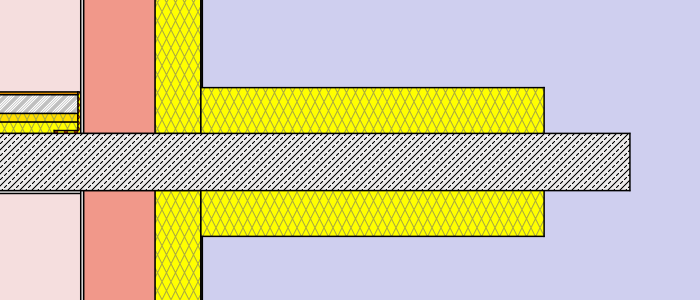
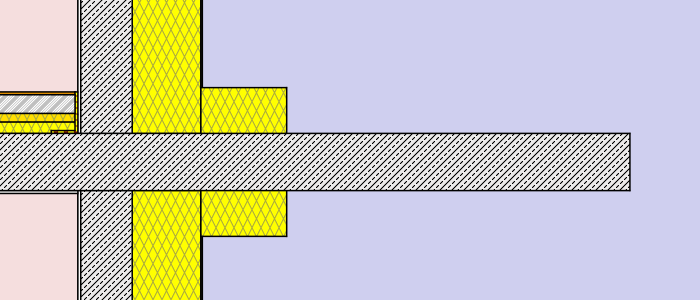
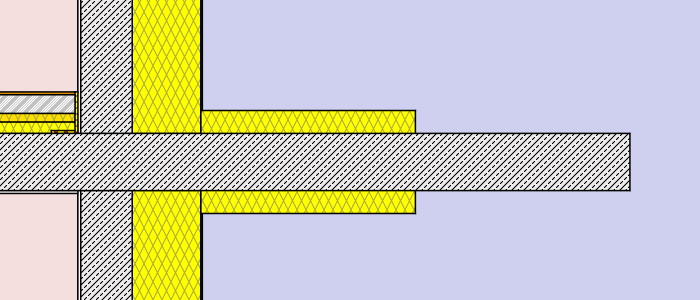
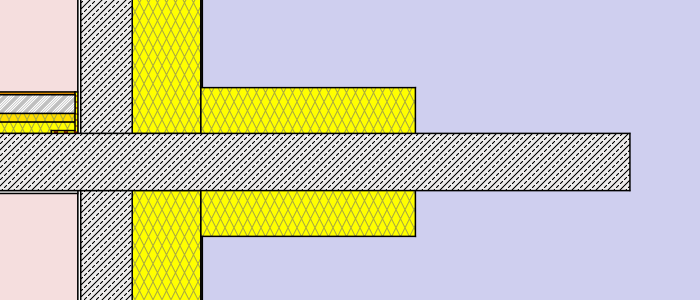
- external insulation – thickness: 8cm (λ=0,038 W/mK)different lengths: 30cm, 75cm, 120cm, full
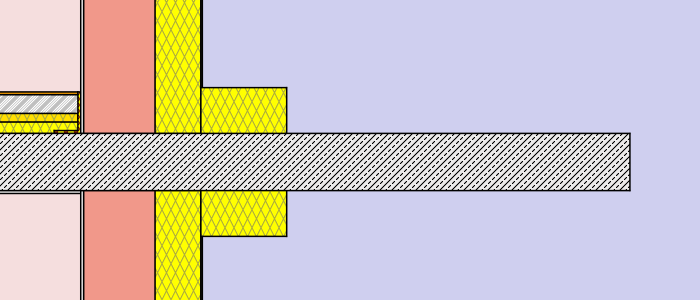
- external insulation – thickness: 16cm (λ=0,038 W/mK)different lengths: 30cm, 75cm, 120cm, full
Hence a total of 2 x 12 simulations were processed. (to get a more detailed chart and table additional lengths were processed for the external insulation cases). Find below a graphical representation of the various simulation cases:
Simulation cases “masonry wall”
Simulation cases “concrete wall”
Simulation & results
According to the local standards in Austria and Germany the calculations of the minimum surface temperature were carried out with an elevated inner air film resistance of Rsi=0,25 m²K/W. The calculations for the heat loss (Ψ-values) were proceeded with the standard air film resistance of Rsi=0,13 m²K/W.
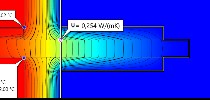
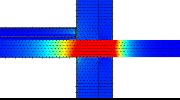
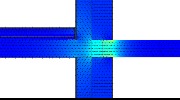
Since the simulations reveal a lot of interesting details all the temperature- and heat flux-views of each simulation are available at the bottom of this article. Once you click on the images in tables you will be able to view them in higher resolution. The quantitative evaluation regarding minimum temperatures and energy loss is presented in the tables and comparison-charts below.
Comparison of the minimum surface temperatures
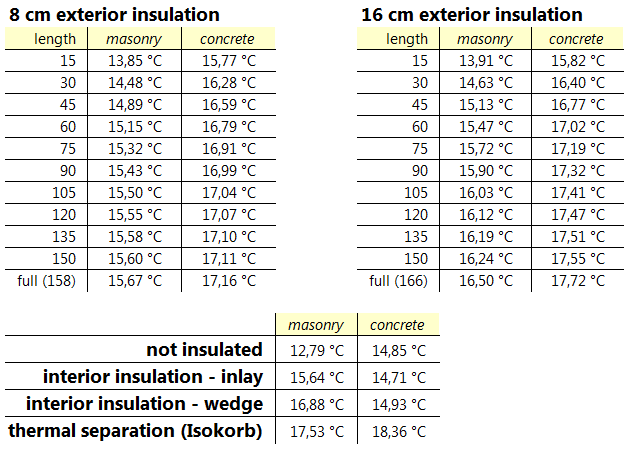
The thermal simulations resulted in the following minimum surface temperatures:
It is easier to compare the results displayed as charts:
Note: dew point and mold-temperatures marked, are valid for an internal climate of 20°C/60% RH.
Comparison of energy loss / Ψ-values
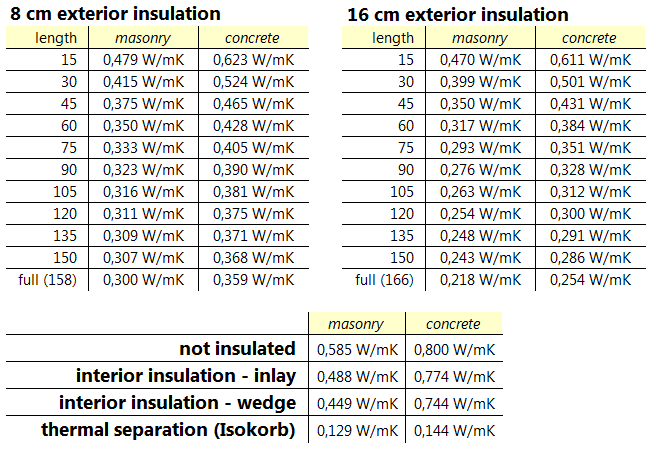
Regarding the energy/heat loss the simulations lead to the following results:
again displayed as charts for easier comparison:
Conclusion and interpretation
Different effects on masonry or concrete walls
An important outcome of the study is that the thermal bridging effect of a cantilever floor differs depending on the wall material. While on the one hand the high conductivity of the concrete wall increases the energy loss, it helps to prevent low surface temperatures on the other hand. The highly conductive wall is able to supply additional heat to the problematic corner region, which can reduce the risk of dew or mold significantly. To put it differently it can be said that modern (well insulating) masonry material helps to reduce energy loss, but can increase the minimum temperature risk in junction areas affected by thermal bridging. This applies also to other classical thermal bridging details, e.g. window connections.
Internal insulation of a cantilever or balcony
According to the distinction just made, one has to differentiate between the effect of internal insulation on a concrete-wall construction and the effect on a modern masonry wall construction. The use of local internal insulation (inlay or wedge) on a masonry wall construction can significantly increase the minimum surface temperatures in the corner area. On the other hand using the same elements with a reinforced concrete wall shows no effect on the surface temperatures or even a slightly negative(!), as it reduces the slab temperature in the junction area.
In terms of energy loss, the effect on the masonry construction is little, whereas it shows practically no effect with the concrete walls. The reason is again the high conductivity of the concrete, which enables the heat flow to easily bypass the insulation elements.
External insulation of a cantilever or balcony
A basic result of the simulation is that external insulation requires extensive or complete application of insulation panels around the balcony. The cantilever slab basically corresponds to a cooling fin design. It has a large surface on the outside and a highly conductive core on the inside. For this reason it is necessary to insulate the balcony with a sufficiently thick panel and as complete as possible. The case of a single sided insulation, which is not presented here, is practically ineffective. With a thorough application of external insulation it is possible to increase the interior surface temperatures significantly. In contrast to the internal insulation case the effect on temperatures is now stronger in the concrete-wall setup than in the masonry one.
In terms of energy loss the external insulation is clearly the better choice than the internal insulation, however still lags considerably behind the values reached with a thermal separation. Regarding the comparison with the internal insulation, it has also to be considered that internal insulation often leads to condensation problems within the construction. For reasons of clarity however this topic is not part of this article, but will be covered in a future one.
Thermal break (Isokorb)
The clearly best results regarding minimum temperatures and especially regarding energy loss can be achieved with the use of a thermally separating element. Related to the non-insulated case the thermally separated balcony achieves energy savings of 78% for the masonry case, and 82% for the concrete wall case. Even compared to the fully externally insulated case with 16cm panels the thermal break is 40% more effective. Also in terms of minimum surface temperatures the thermal separation clearly achieves the best (=highest) values.
The high efficiency of the thermal separation is explained by its position. Located precisely in the insulation layer of the building the element has to insulate the smallest possible surface. In this case the thermal separation has to cover an effective length of 20cm (slab thickness) whereas the external insulation has to contain the heat on an effective length (surface) of 320cm (two times the length of the balcony plus its height).
Structural/design separation
It should be noted that, if possible, the structurally completely separated balcony represents the ideal solution in terms of temperature-reduction and energy loss. However often it is not possible to implement this solutions due to esthetic, design or other reasons. Regarding this study the case of a structural separation is not relevant as there would be no thermal bridging. In this case the internal surface temperatures and energy performance correspond to ones of the plane wall for the concrete walls (Ψ=0,000 W/mK) and are only slightly offset for the masonry wall (Ψ=0,025 W/mK).
Thermal simulation – temperature views and measurement results
Note: the minimum surface temperatures shown in the images below were calculated with an elevated air film resistance of Rsi=0,25 m²K/W. The Ψ-value calculations, isotherms and temperature colors are based on a simulation with the standard inner air film resistance (Rsi=0,13 m²K/W).
for masonry wall model
for concrete wall model
Thermal simulations – Heat-flux views
for masonry wall model
for concrete wall model
Author: DI Daniel Rüdisser, HTflux
Note: You are permitted and encouraged to use images from this page or to set a link to this page, provided that authorship is credited to “www.htflux.com”.


