Editing vertices
Editing vertices is a very powerful method to alter you geometry without having to redraw objects. To get into this function push the select vertices button on the left side of the drawing tool panel.
![]()
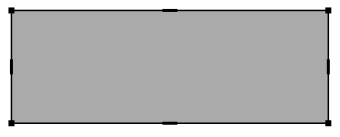
Once you have pushed the button all vertices and center of line markers of the objects will become visible.

Selection of vertices
There are several ways to select vertices:
- You can hover over a vertex and left-click on it once it has green border.
- You can select a center of line marker to select two neighboring vertices at once.
- You can right click on a vertex or marker and select it by its object name. This can be very useful if you have two or multiples vertices lying on top of each other. Set or unset the small tick next to the object name to select or unselect the vertex.
Multiple selection of vertices
Depending on your task use one of the following methods to select multiple vertices
- individual selection with left mouse button holding the CTRL key down.
- selecting the vertex by object name in the right click context menu.
- using a rectangular selection: Click somewhere between the vertices and open a rectangular selection frame holding the left mouse button down. All vertices within this area will be selected.
- using a half-plane selection: click between some vertices and move the mouse either horizontally or vertically (like for the rectangular area). While holding the mouse still down click either V or H on the keyboard. This will bring up a vertical or horizontal half-plane. Now move the mouse either up or down, or left or right to select the appropriate half of your geometry. Once you are happy with the selection open the mouse. All the vertices in the half plane will be selected. This method is very powerful e.g. to increase the height of a floor slab or the width of an insulation layer, without having to move all objects individually.
Modify vertices
There are basically two ways to modify vertices:
- you can use the modify buttons that are usually used for whole objects (see Modify objects). If you are in vertices mode the functions will apply to all vertices selected. However, usually you will modify vertices with the follow method:
- move objects using the context menu:

- Select one or multiple vertices (see above).
- Pick one of the selected vertices, having an appropriate position:
- Right-click on this vertex and select one of the following functions of the context-menu:
- Move freely
- Move vertically
- Move horizontally
- Now you have again several options to move the vertices:
- Use the mouse and snapping tools to define the new position of the vertex selected.
- Type in the coordinates for the new position of the vertex selected (e.g. 5;3)
- Type in relative coordintates for the new position of the vertex select (e.g. R 10;10)
- when in vertical or horizontal mode: type in the value for the displacement (e.g -5) to move the vertices for 5 units to the left, when in horizontal mode.
Watch the following video to see how easy it is to increase the thickness of a layer even if it is part of complex geometry: